Discover how to build a wooden bed frame [step by step], turning your bedroom into a haven of comfort and style. Our comprehensive guide walks you through material selection, precise measurements, crafting the headboard, assembling the frame, and adding finishing touches. Unlock your inner DIY enthusiast and create a masterpiece that blends function with flair.
Measure and Plan to build a wooden bed frame
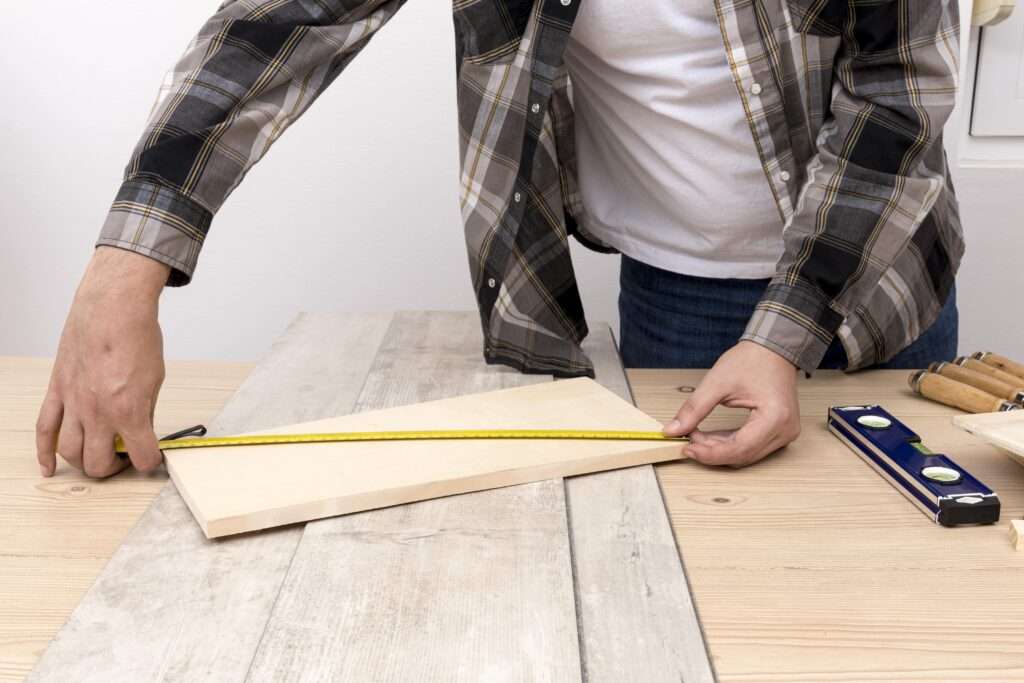
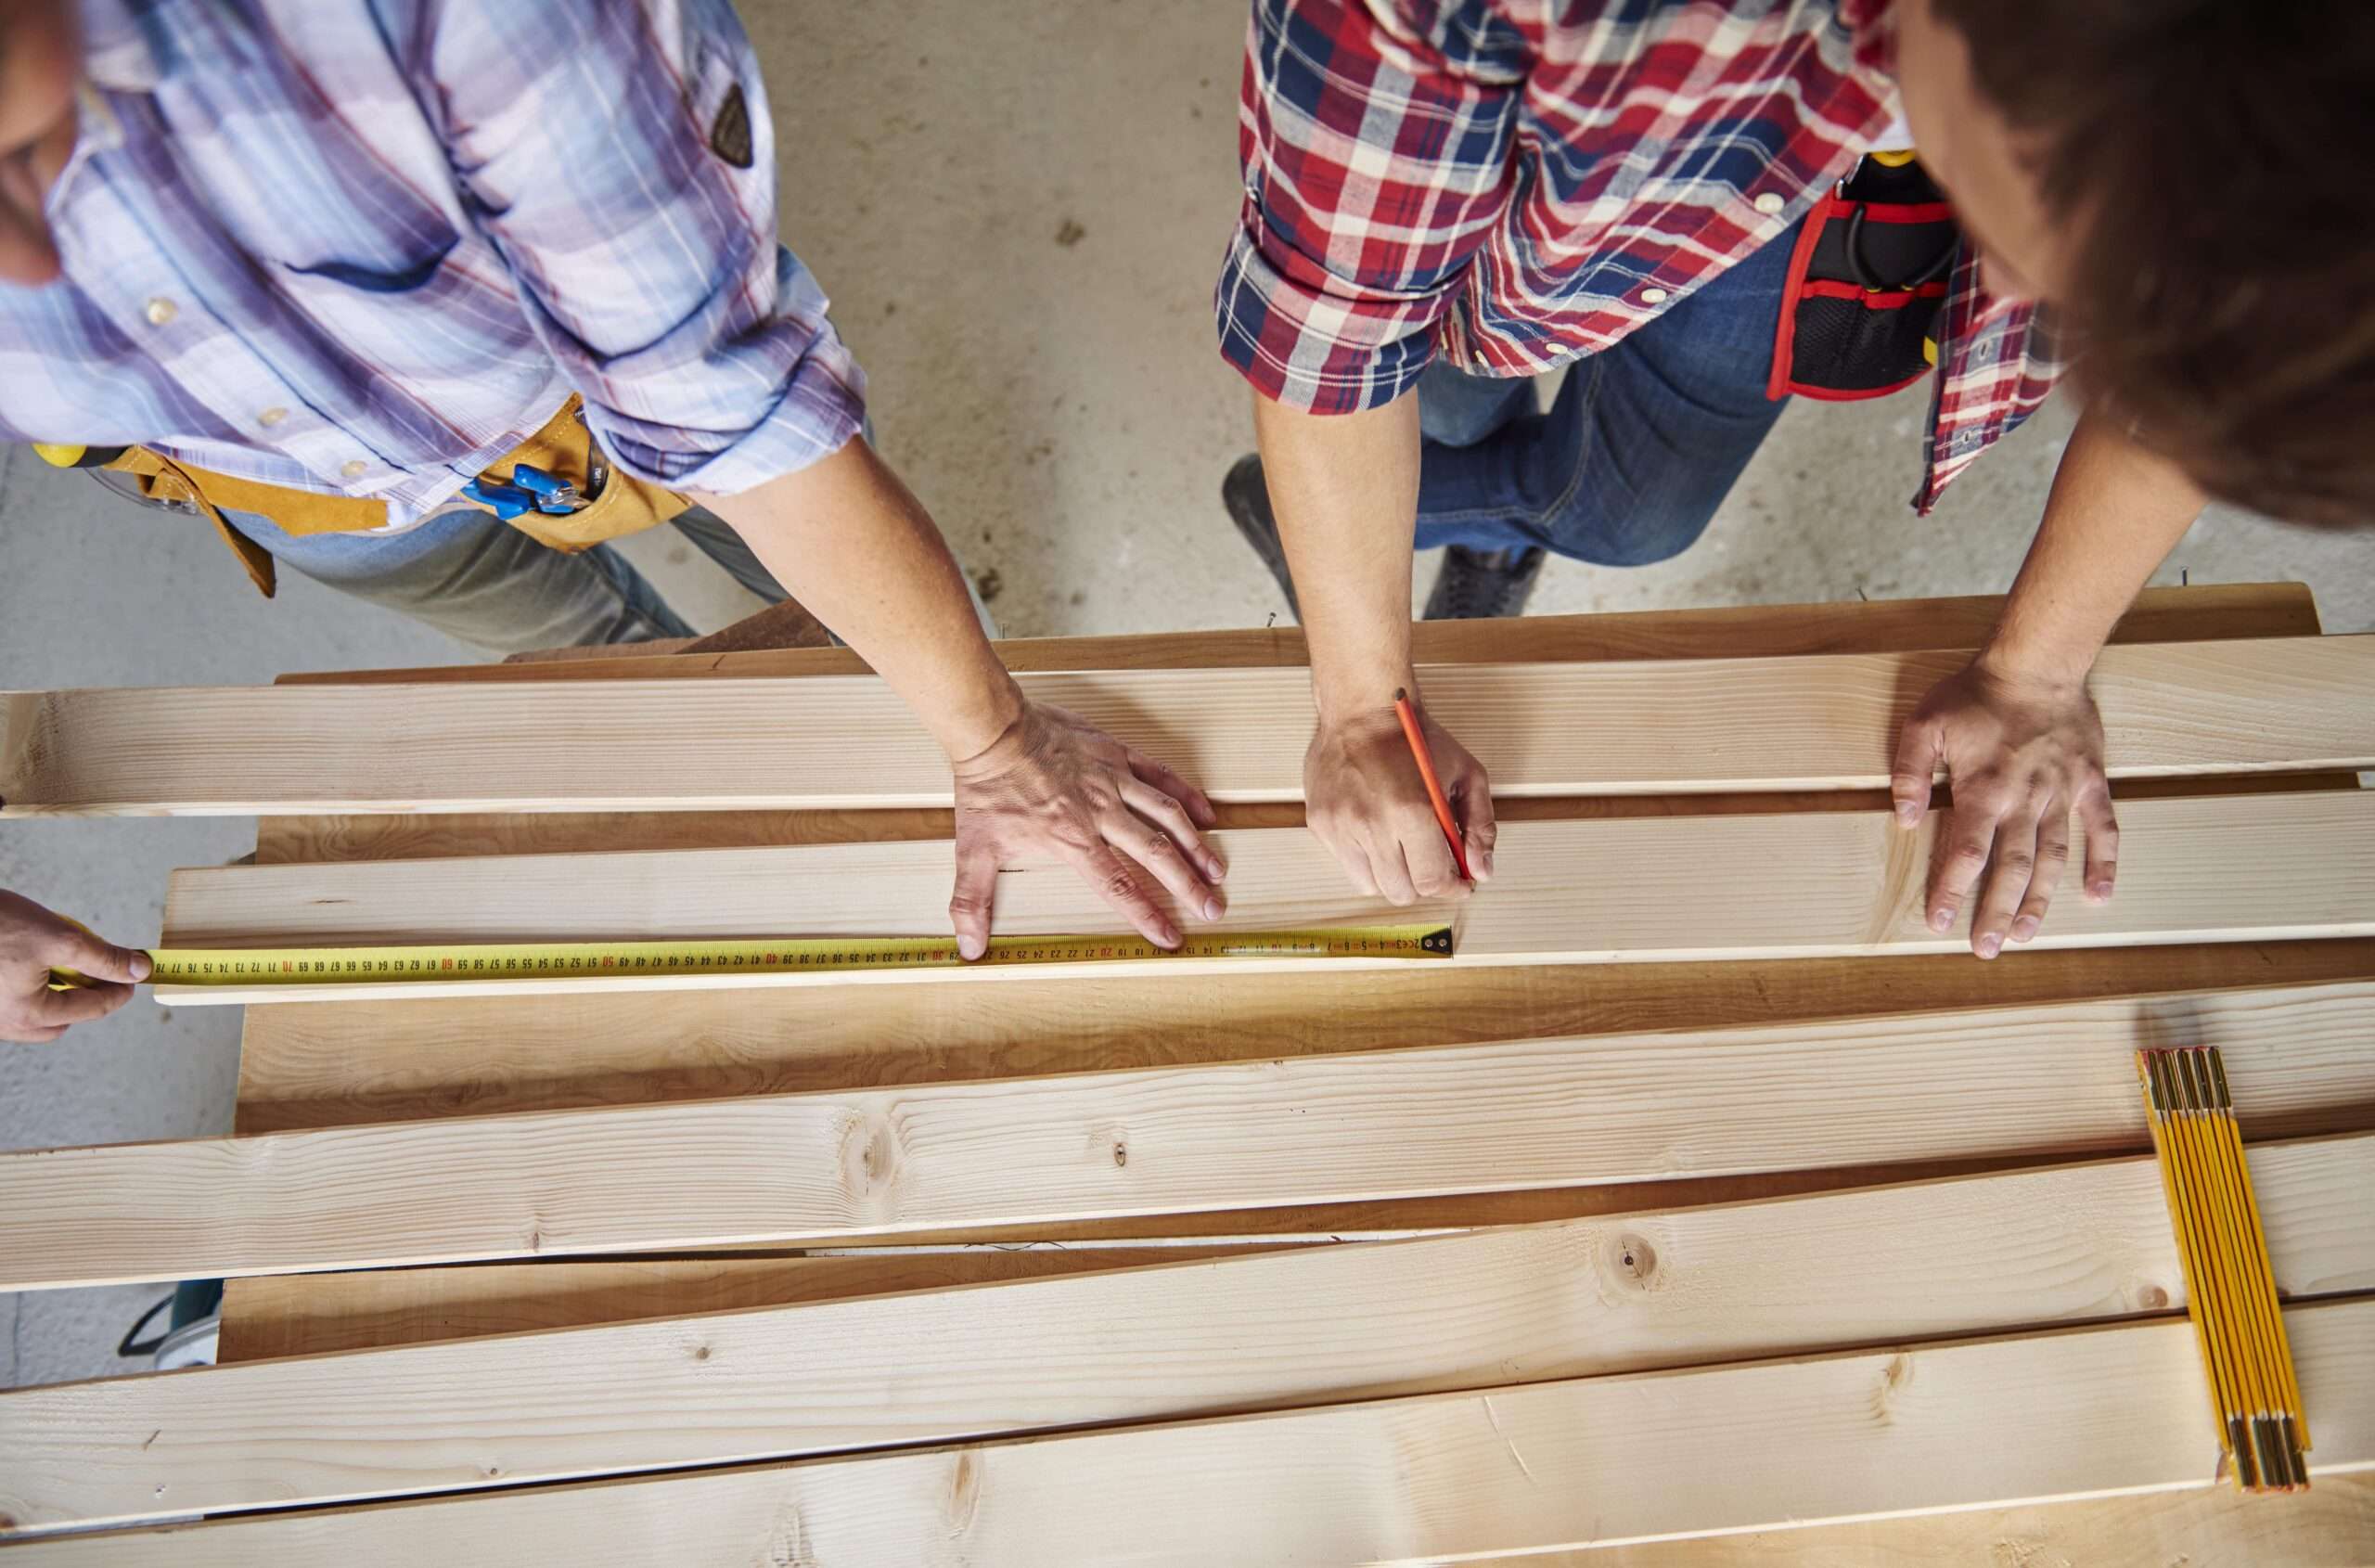
Accurate measurements and meticulous planning are fundamental to the success of your wooden bed frame project. Taking the time to measure with precision and plan thoughtfully ensures that your bed frame will seamlessly accommodate your mattress while aligning with your design vision.
Begin by measuring the dimensions of your mattress – its length, width, and thickness – as these measurements will serve as the initial foundation for determining the overall size of your bed frame.Remember to consider any extra space you’d like around the mattress edges for aesthetic or practical reasons.
Once you have your mattress measurements, decide on the ideal bed frame size based on factors such as room space, personal preference, and the style you wish to achieve. Common sizes like twin, full, queen, and king are popular options to consider.
Choose Wood and Prepare Materials

Selecting the right wood is pivotal for your bed frame’s aesthetics and durability. Opt for hardwoods like oak or maple for strength, or pine for a budget-friendly choice. Gather the necessary materials – wood screws, corner brackets, wood glue, sandpaper, and finish. Cut the wood pieces according to your measurements, ensuring precise edges. Sand the surfaces to smoothness and apply your chosen finish for protection and beauty. These preparatory steps lay the foundation for a sturdy and visually appealing bed frame that suits your style and withstands the test of time.
Build the Headboard and Footboard

Crafting the headboard and footboard is where your bed frame takes shape. Follow these steps:
- Cutting and Shaping: Using your measured dimensions, cut the wood pieces for the headboard and footboard. Shape them according to your design, ensuring clean lines and symmetry.
- Assembly: Assemble the pieces, securing them with wood screws and wood glue for added strength. Use corner brackets for stability at joints.
- Decorative Details: Add decorative accents or carving if desired, enhancing the visual appeal of the headboard and footboard.
- Sanding: Smooth all surfaces with sandpaper, removing rough edges and ensuring a polished finish.
- Finishing Touches: Apply your chosen finish – stain, paint, or sealant – for protection and style.
Construct the Bed Frame Base
Constructing a robust bed frame base is essential to ensure the stability and longevity of your creation. To begin, cut and assemble the side panels using the measured wood pieces, paying careful attention to precise angles and alignments for a secure fit. Next, attach the support beams horizontally across the side panels, using wood screws and corner brackets to establish a strong and dependable connection.
Depending on the size of your bed frame, consider adding a center support beam to enhance stability, particularly for larger mattresses. Choose between a solid platform or evenly spaced slats to provide optimal support for your mattress, securing them firmly onto the support beams.
Assemble the Bed Frame

Bringing your bed frame together is a satisfying step in the process. Follow these instructions for seamless assembly:
- Connect Headboard and Footboard: Align the headboard and footboard with the side panels. Use wood screws and corner brackets to securely attach them, ensuring stability and symmetry.
- Attach Support Beams: Place the support beams onto the previously installed side panels. Fasten them securely using screws and brackets, reinforcing the frame’s strength.
- Install Slats or Platform: If using slats, position them evenly across the support beams. For a platform, secure it onto the beams. Ensure proper spacing and alignment.
- Tighten and Adjust: Double-check all connections and tighten any screws if needed. Make sure the frame is level and balanced.
- Test Stability: Gently test the frame’s stability by applying slight pressure. If it feels solid and secure, you’ve successfully assembled the bed frame
Sanding and Finishing:

Creating a polished and refined look for your bed frame involves careful sanding and finishing. Here’s how to achieve a smooth and elegant finish:
- Sanding Preparation: Begin by thoroughly cleaning the wood surfaces, ensuring they’re free from dust and debris. This prepares the wood for sanding.
- Smooth Out Roughness: Use sandpaper with a medium grit to gently sand the surfaces of your bed frame. Focus on smoothing out any rough edges, uneven spots, or imperfections.
- Progress to Fine Grits: Gradually switch to finer grits of sandpaper for a smoother finish. This helps create a soft, touchable surface that’s visually appealing.
- Round Edges: Consider rounding the edges slightly with sandpaper for a comfortable and polished feel.
- Choose Your Finish: Decide on the finish you want for your bed frame. Stain can enhance the wood’s natural beauty, while paint offers color options. A clear sealant provides protection.
- Application: Apply the chosen finish using a brush or applicator, following the manufacturer’s instructions. If you need to apply more than one coat, give them enough time to dry in between.
- Final Inspection: After the finish is dry, inspect the bed frame for uniformity and smoothness. Make any necessary touch-ups to ensure a flawless appearance.
Attach Hardware and Accessories:
As you near the completion of your wooden bed frame, the time has come to infuse it with character and functionality through hardware and accessories. First, carefully select hardware like brackets, screws, and corner guards that both enhance the frame’s structural integrity and complement its aesthetic. Consider adding decorative bed legs to elevate the frame, lending a touch of sophistication. Ensure that support slats are securely in place, evenly distributed to provide consistent mattress support. For a personal touch, incorporate decorative accents such as metal details, intricate carvings, or fabric embellishments, infusing your unique style. Thoroughly inspect the alignment and attachment of all hardware, guaranteeing stability.
Conclusion:
Embarking on the journey to build your own wooden bed frame is a gratifying endeavor that combines creativity, craftsmanship, and practicality. Throughout each step, from precise measurements and careful planning to the artful assembly and finishing touches, you’ve transformed raw materials into a functional and aesthetically pleasing piece of furniture. Your commitment to detail, alignment, and stability ensures a bed frame that not only supports restful sleep but also enhances the ambiance of your bedroom. As you lay back and admire your creation, take pride in the accomplishment of crafting a unique and personalized bed frame that adds a touch of your personality to your living space. Your masterpiece not only holds dreams but also stands as a symbol of your ingenuity and dedication.